Case Study Editor
The Pipeline Interface has a specific editor for categorisation using a Case Statement.
When working with GA4 data, we’re often going to want to classify things into buckets.
For example:
- Spam vs Not Spam
- Organic Search vs Paid Search vs Email etc.
The categorisation editor makes this easy and also very flexible depending on your needs.
We classify things into buckets using Case Statements
You may have come across these in Looker Studio but just not known what they are called.
Case statements let you sort data into different categories based on certain conditions.
You set the rules, and the case statement checks the data to see which rule it fits, then assigns it to the right category.
Let’s show a basic example
In this example, we’re categorising people based on their ages into either:
- Child - If they are less than 13 years old.
- Teenager - If they between 13 and 19 years old.
- Adult - If they are between 20 and 64 years old.
- Senior - If they are greater than or equal to 65 years old.
- Unknown - If they match none of these.
The data in this example looks like this:
| name | age |
|---|---|
| john | 12 |
| sally | 4 |
| mo | 78 |
| lenny | 21 |
| noel | 3 |
The column that we’re using for this categorisation is the age column.
After the categorisation, this is how the table looks with the categorisation.
| name | age | age_group |
|---|---|---|
| john | 12 | Child |
| sally | 4 | Child |
| mo | 78 | Senior |
| lenny | 21 | Adult |
| noel | 3 | Child |
How do case statements work?
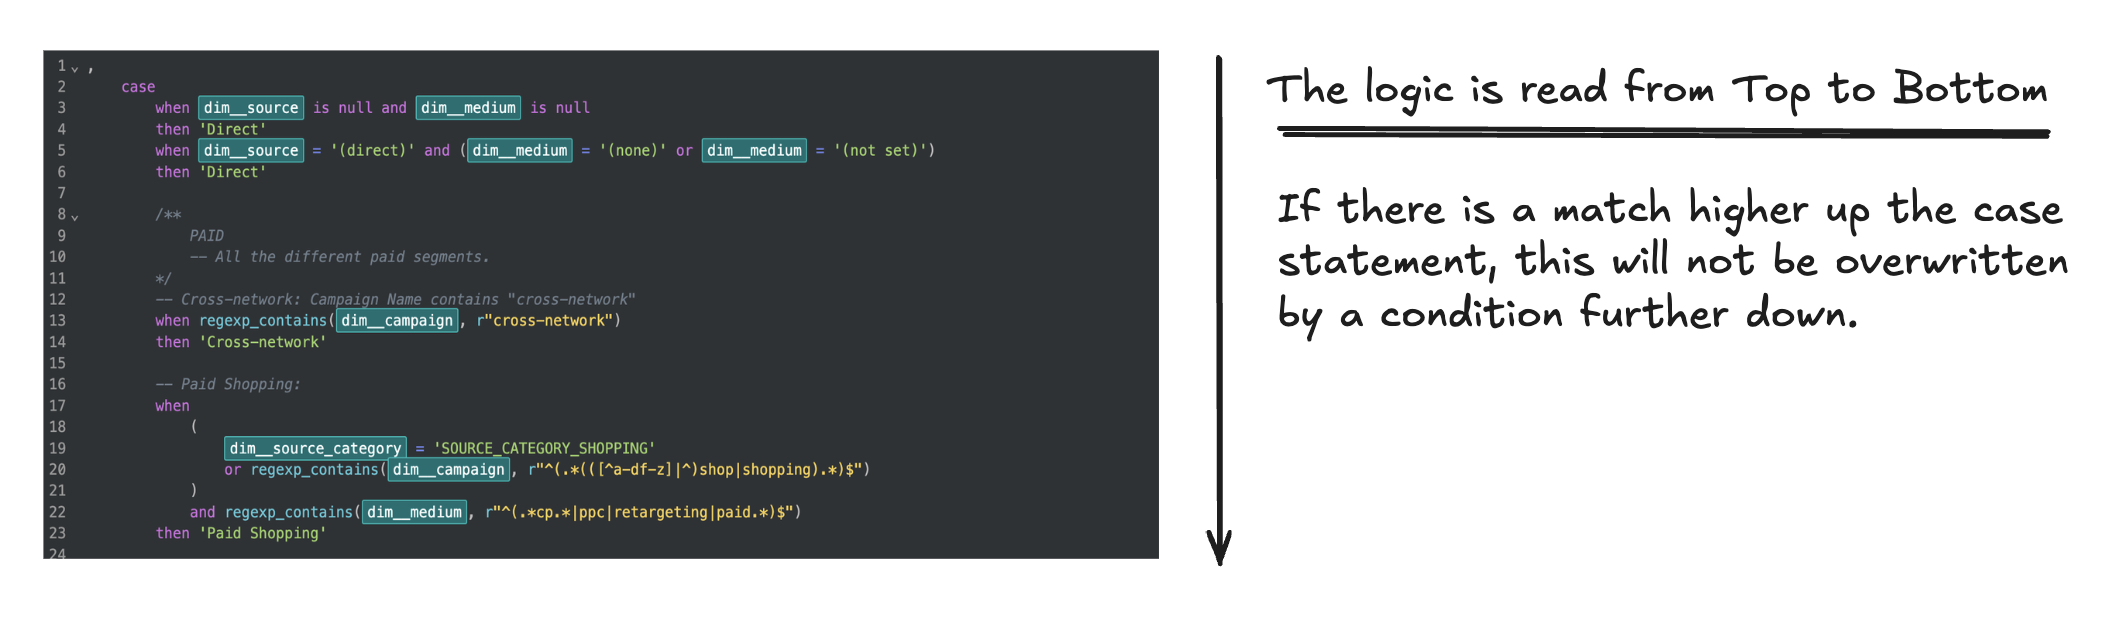
Case statements read from top to bottom.
They check each condition one by one to see if it matches the rule.
It goes through the conditions in order, stopping once it finds a match.
If no match is found, it falls back to a default option (which in our example above would be ‘Unknown’).
The rules can be based on different criteria:
1. Greater than (>) and Less than (<):
You can use operators such as > or < to compare values.
Example: This Case Statement checks if age is greater than 18 to categorise as an "Adult," or 18 and below as a "Minor."
2. Equal to (=):
You can use = to check if something is exactly equal to a specific value.
Example: This Case Statement checks if the birth_month matches a specific month and then categorises based on that.
3. Other Comparisons:
You can also use other operators like >= (greater than or equal to), <= (less than or equal to), and <> (not equal to).
Example: This Case Statement checks whether the score is greater than or equal to 50.
4. Using OR in case statements:
The OR operator allows you to check if any of multiple conditions are true. This is useful when you want to match several different values or ranges.
Example: This Case Statement checks if day is either "Saturday" or "Sunday", it will return "Weekend". If neither, it defaults to "Weekday."
5. Using Regex (Regular Expressions):
You can use regular expressions (regex) to match patterns in a string.
Example: This Case Statement categorises Traffic into Default Channel Groups.
How does Pipeline’s categorisation editor work?
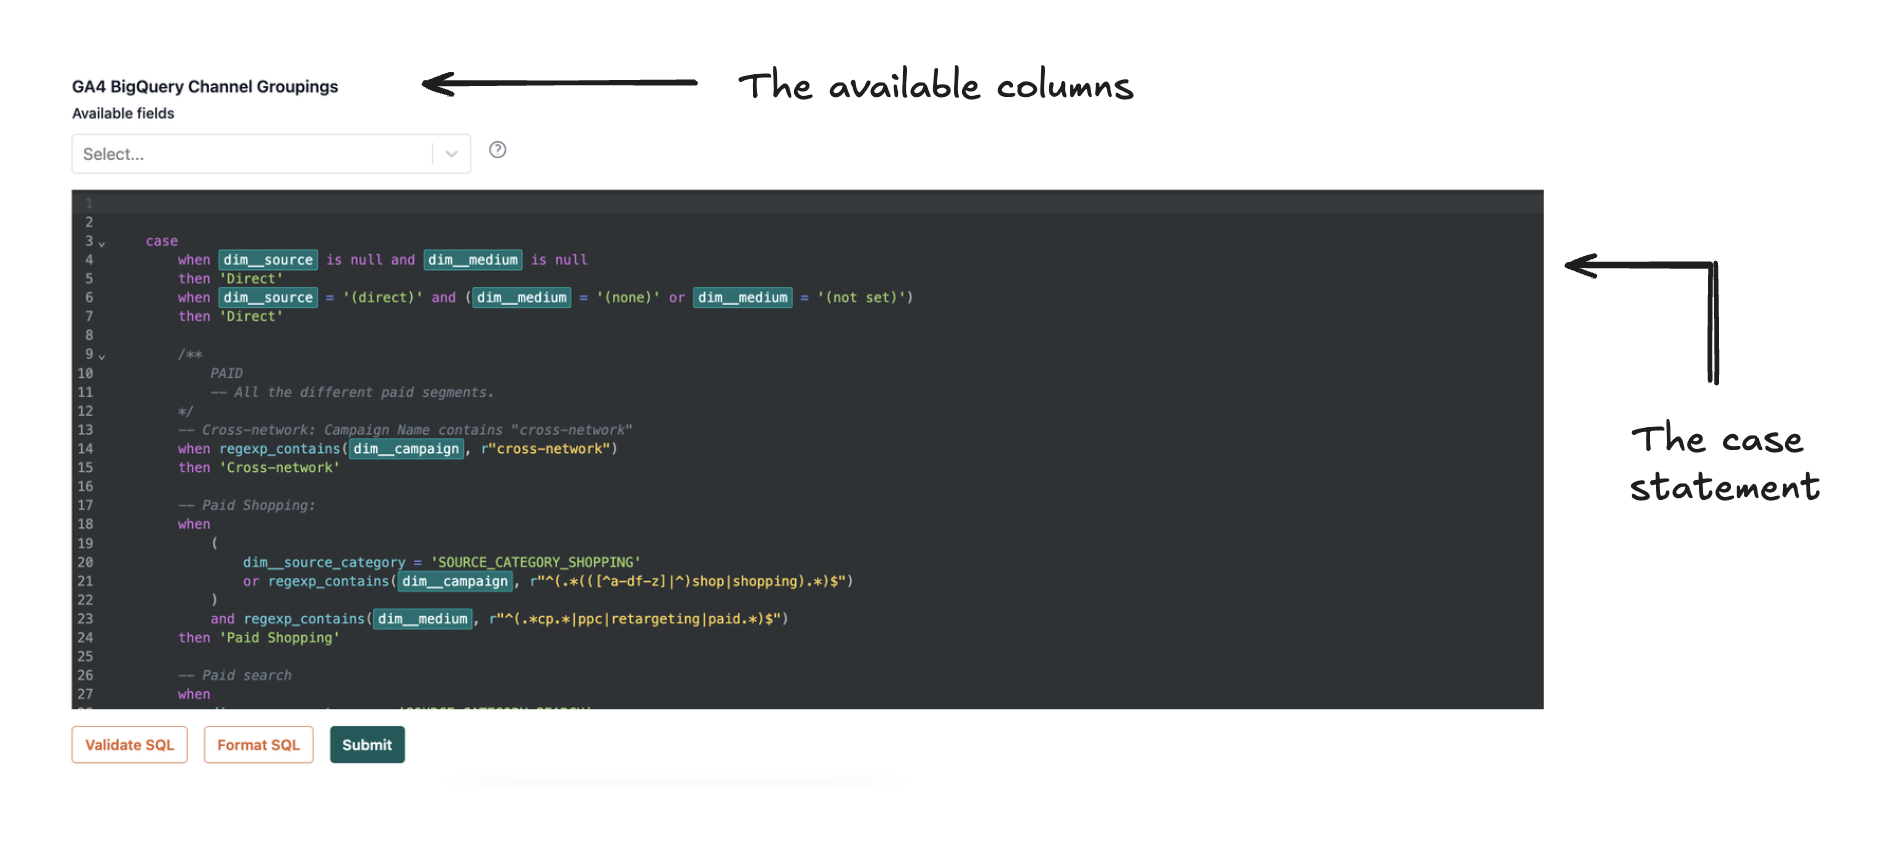
When you’re editing a case statement we’ll show you a window which looks like this.
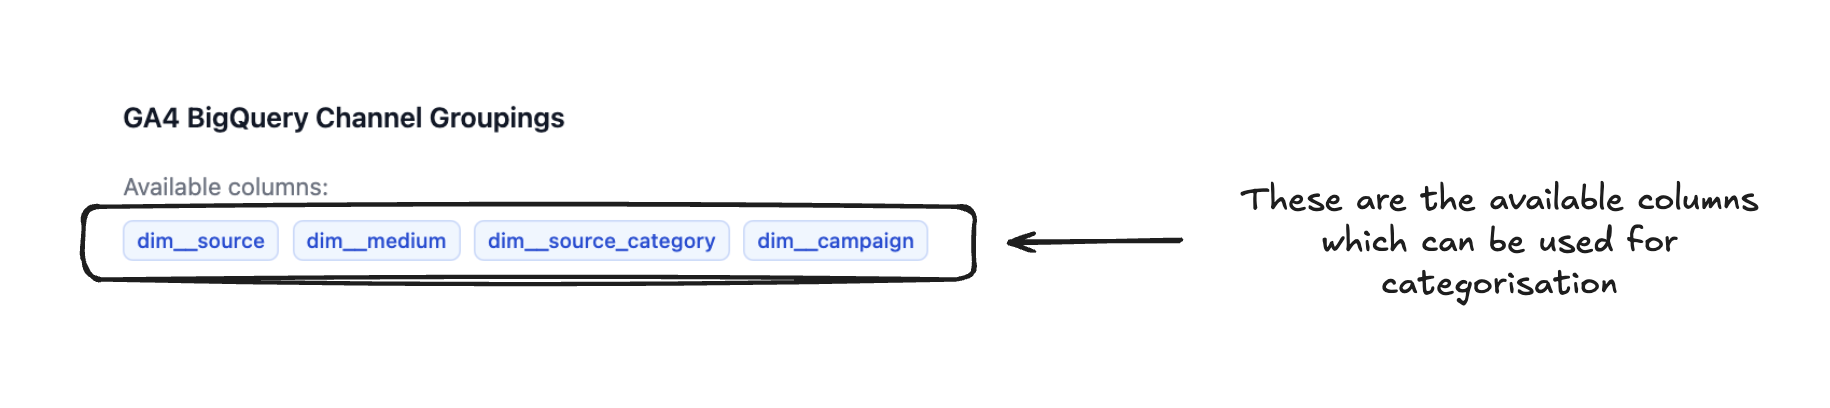
There are two important chunks of it.
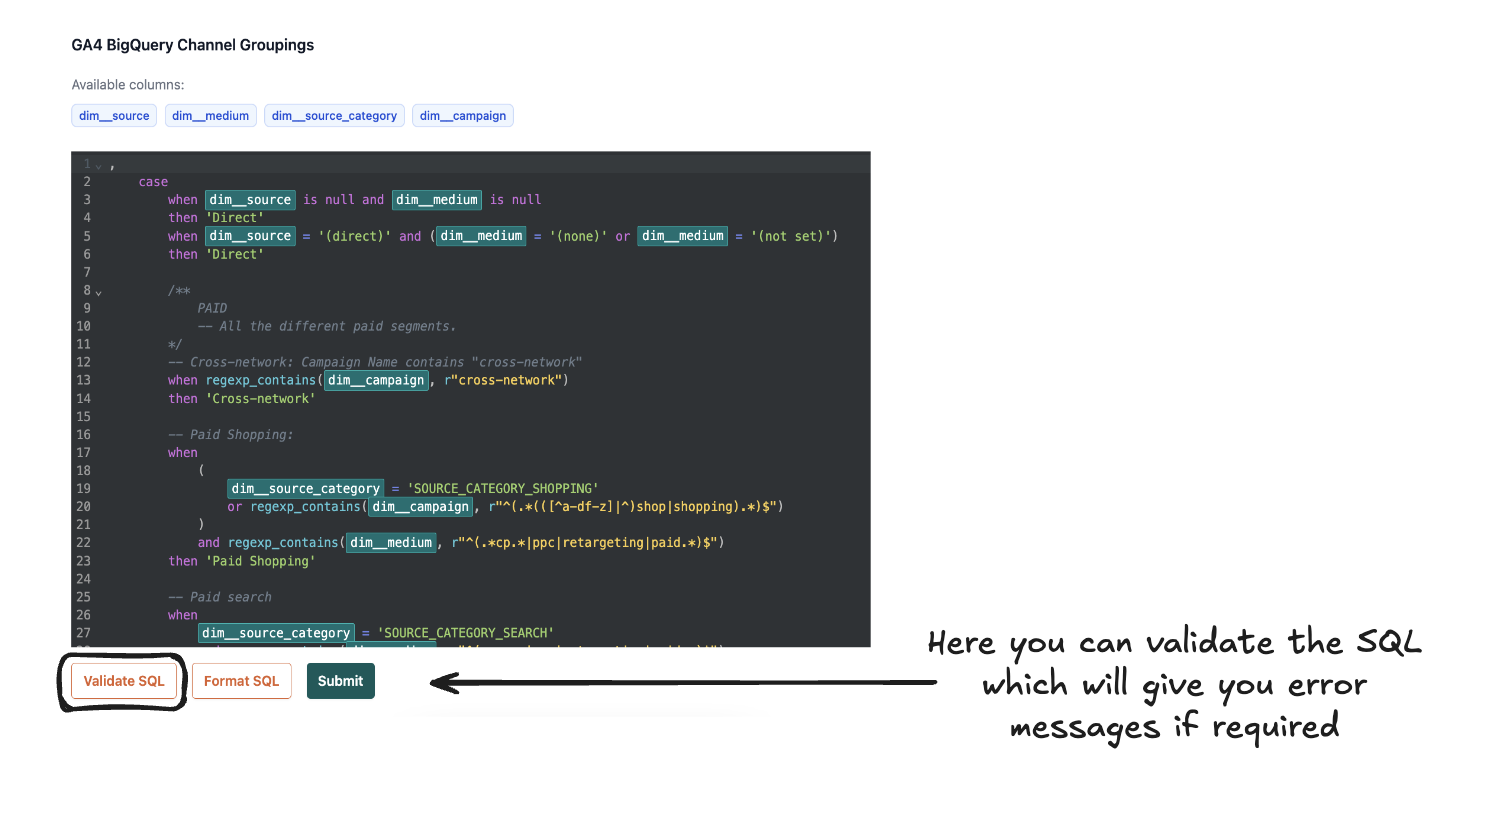
Then when you make changes you can:
- Validate the case statement
- Format the case statement
Validate makes sure you can't save anything which will break the case statement. Format just makes it easier to read.
Will validate spot bad categorisations?
No.
It will tell you if the case statement is invalid but it won't tell you if you've made a mistake in your rules (e.g. classifying Tiktok as Organic Search).
This will likely due to:
a. The order of the case statement or
b. Errors in the regex/ matching rules.
So let's take them one by one...
a. Case statements read from top to bottom. Ensure that you’re most important categorisations are listed top and then work down. This way, they take priority over the others lower down.
b. It’s very easy to user a greater than rather than a less than or have typos in your regex matching. Go back through the rules you’ve set for things being miss-categorised and check those.